Showing posts with label Crock Pot Meals. Show all posts

Sunday, June 24, 2012

Crock-pot Multitasking

I like finding ways to use things as efficiently as possible.  With that in mind, I found a neat way to heat more than one thing with my large (7qt) crock-pot.  

When making tacos for our fellowship meal after Sunday service, we can put refried beans in a glass container, in this case a heavy duty, 2c. glass measuring cup, and set it in the pot with the taco meat so they heat at the same time without having to take a second slow cooker.  Although it doesn't look like much meat, it was 4 1/2lbs., which was more than enough for the 7 of us that were eating, and as you can tell, it could have held a bit more.
We've also used this for heating hotdogs and chili at the same time.
Any thick glass container will work as long as it leaves enough room for the other food and is tall enough to keep the main food out of the secondary food.  A wide mouth, pint size canning jar worked well for chili since several of mine don't eat chili on their hotdogs.
This is my other trick.  
Use a cookie sheet in place of the lid and you have a nice sized surface for warming bread; in this case, tortillas for the soft tacos.  I have one a little smaller that we normally use, but I was in a hurry and this one was easier to get to.  Just make sure the pan covers the top of the cooker.
We've used this successfully for biscuits, rolls, cornbread, hamburger and hotdog buns, and obviously, tortillas.  By covering the bread with a towel, you can keep more of the heat on it.
You can heat the wrapped bread right on the lid, I have done that too, but since the lids are domed, and have a handle on them, you have to wrap the bread in smaller bundles and balance them around the handle. The cookie sheet works better in my opinion.  And for the record, if you break your lid, you can use a cookie sheet in it's place until you can order a replacement.  Which, incidentally, is how I came by using one to warm bread.

I hope this little trick can come in handy for someone else out there.  It has sure worked well for us.

I've linked this post with this week's Homestead Barn Hop.  
Check them out.  I've already enjoyed several of the links, and I'm sure you will too.

I've also linked with the Farmgirl Friday Blog Hop.
Farmgirl Friday Blog Hop

post signature

Saturday, October 15, 2011

Crockpot Cooking: Camp Stew

I got this recipe from a salesman who frequents history reenactments, and while the smell of a real wood fire and dishing a bit of this up out of a cast iron cooking pot do add to it's appeal, it still tastes quite good when cooked on your stove, or in your crock pot. I'll give you the quatities for a regular sized batch.


Camp Stew
1 smoked sausage or kielbasa                4-5 potatoes
2 carrots                                                 1 small onion
1 can diced tomatoes                             2 ears of corn (or 1c. frozen)
1/2 head of cabbage                              Tony Chachere's Creole seasoning
cornstarch (optional)

Clean and chop your onions, carrots and potatoes. I only peel the potatoes if they are russets.
Cut corn from the cob. I cut my sausage in half rounds to make it easier to eat, but that's optional.
Place all of this, along with the tomatoes and 2tsp. seasoning in your crock pot and cover with water.
Cook all day.
If you're doing this on the stove it will cook in about 30-40min - just 'til the carrots and potatoes are tender.
A few minutes before serving, turn off the heat, chop your cabbage and add to the pot, stirring to mix it in.
As you can see, I had to transfer mine to a large stock pot because of the quantity I was making, but if you're making a standard sized recipe this can all be done in the crock pot. Taste, and add more seasoning if necessary.
That's all there is too it - or to the original recipe anyway.
We prefer to thicken it with some cornstarch, but that is entirely up to you. If you do, mix your cornstarch  with a little cold water and stir it into the stew before turning off the heat. Allow it to heat through for a few minutes, then turn it off and add the cabbage.
This is currently the only way I eat cooked cabbage because, in reality, the cabbage isn't cooked, it's just kind of heated up. That way you don't have slimy, yucky cabbage in your soup.
post signature

Sunday, July 3, 2011

Crockpot Cooking: Apple Butter

I know. We're up to our eyeballs in zuchinni, the cukes are coming in at an alarming rate, and soon we'll be knee deep in diced tomatoes and tomato sauce. Who can think of canning apple stuff at a time like that. Well, I can. The apples will start ripening around here in another 2-3 weeks. That is, the sweet ones - the ones you want to turn into apple sauce and apple butter. I usually just wait and get whatever still happens to be picking when the Granny Smith's come in, but I'd like to try some of the sweeter ones this year.

All that being said, on to...

Apple Butter
Applesauce                Brown sugar
Cinnamon                   Allspice
Cloves                        Nutmeg

Pour your crock pot nearly full of applesauce. Add some brown sugar - I usually start with 1c. and then add more later if I think it needs a little more sweetener. Add your spices - start with about 2tsp. cinnamon and 1/2tsp each of the other spices. Then turn your crock pot on low. Some books or web sites suggest letting the lid rest on wooden spoons in order to allow the steam to escape, but I just put a splatter guard over the top instead. I find the moisture evaporates even quicker that way. You'll cook this down about half and then add more apple sauce. When it has cooked down about a third more you can taste it and see if you think it needs anymore sugar or spices. Keep adjusting things and cooking until you're satisfied with the taste and thickness. I like mine very thick, so I cook it down a lot. If you like it runnier, you just don't cook it as long, or if it already thickened too much you could add more applesauce or apple juice. It usually takes most of a day for it to cook down completely. You'll want to stir it on occasions as most crock pots have a hot spot or two that will tend to burn during very long cooking. In addition to that, you'll want to scrape down the sides as it cooks to keep them clean so there won't be any residue to burn. This may sound like a lot of work but it's not really - and it certainly beats the stove top method that requires constant stirring. After that, all you have to do is can it. Prepare your jars, rings, and lids and let the water in your canner get hot. Fill the jars and process in the water bath, after it comes to a full boil;  5 min for pint or half pint, or 10 min. for quart. Personally, I like the little 4oz. jars and I process them 5 min. If you're not familiar with canning, please look it up - these are not detailed instructions and are only helpful if you're already familiar with all the other necessary steps.
Some of the apple butter we canned in 2009 (the small, dark jars) - I didn't have as many 4oz jars then. I made sure I had plenty of them last year.

Sometimes I make apple juice for apple jelly by cooking peeled, cored apple slices and allowing them to drain in a jelly bag. When I do it that way, I use the leftover apple pulp(pureed with a stick blender) for my apple butter. There's no sense in letting it go to waste and a bonus is that it doesn't take as long to cook it down since quite a bit of the moisture has already been removed from it.

post signature

Saturday, June 25, 2011

Crockpot Cooking: Cheese Dip

I love this cheese dip. So does everyone else in my family, extended family included. We rarely have a family function (only Thanksgiving) for my mom's side of the family where this dip isn't on hand. I made the mistake of not making it for one of the birthday partys one year and nearly didn't hear the end of it, so it's now a staple item. Some of them even want it for Thanksgiving, but I put my foot down about that one.
There are many recipes similar to this floating around, some with Velveeta and salsa, some very close to mine but using ground beef...this is the way we like it.

Cheese Dip
1 large box Velveeta
1 lb sausage - regular or hot, depending on how spicy you like it
1 can original Ro*tel (diced tomatoes and chilies)
chips - your preference

This easily doubles (that's how much I ususally make), or even triples if you have a large enough crock pot.

Cube your Velveeta and put it in the crock pot.
While you're working on this, start cooking the sausage, breaking it apart as you go.
Drain the fat off the sausage and add it to the pot.
Next, pour in your Ro*tel.
Give everything a good stir and turn your pot on low until everything's melted, about 2 1/2-3 hours.
You can turn it on high and it should melt in about 1 1/2 hours(depending on your pot), but you need to check it more often because the cheese will burn on the sides of the pot.
Once it's done, keep it on your warm setting, if you have one.
The cheese does burn on the edges if left too long, but it will last through a typical buffet dinner, or even longer, especially if you remember to go back and stir it once or twice.

We like to use the hot sausage with this and have even added extra peppers when we felt it wasn't spicy enough. If there will be a lot of small children I will use regular sausage, or mix it half and half with hot. I use the homemade diced chilies and peppers that we canned, so mine is a bit more spicy than the original Ro*tel. I think they make a hot version if you really want it spicy.

This is great on regular potato chips, tortilla chips, Fritos (the Scoops work great), or just about anything else. My older brother and my nephew put it, along with almost every other condiment available, on their hotdogs, and many in my family like to top a taco salad with it. They tell me it's good on hamburgers and baked potatoes too. I'm with them on the potatoes, and may try it one day, but I think I'll do without it on my burger.
post signature

Saturday, June 18, 2011

Crockpot Cooking: Hotdog Chili

The first time I ever found out how absurdly easy it was to make hotdog chili, I decided that I would start making it instead of buying it. Now, since we try to eat less pre-processed foods, I'm glad I learned how to make it.

Hotdog Chili
5 lbs Ground Beef           1 Large Onion
Tomato Juice                  Chili Seasoning mix (optional-I used 2)
Chili Powder                   Salt (also optional)

I don't bother making this in small amounts, although you can if you want. I typically make it when we're having company and freeze anything that's left, in meal sized portions, for our own use later. We're not really big hotdog eaters, so that seems to work fine for us. You can make this with nothing but salt and some chili powder, but I really prefer to use a couple of envelopes of the chili seasoning mix. It probably has cumin in it, so you could just add some of that instead, if you happen to keep it on hand - which I don't. You could also use more of the packets and not use any additional chili powder or salt if you like, but I like to taste and adjust as I go.
While you brown your ground beef, finely chop the onion.
Drain off as much of the fat as you can and throw in the onion for a few minutes, just until it begins to turn translucent.
Next, pour in your tomato juice. How much you use will depend on how runny, or thick you want your chili.
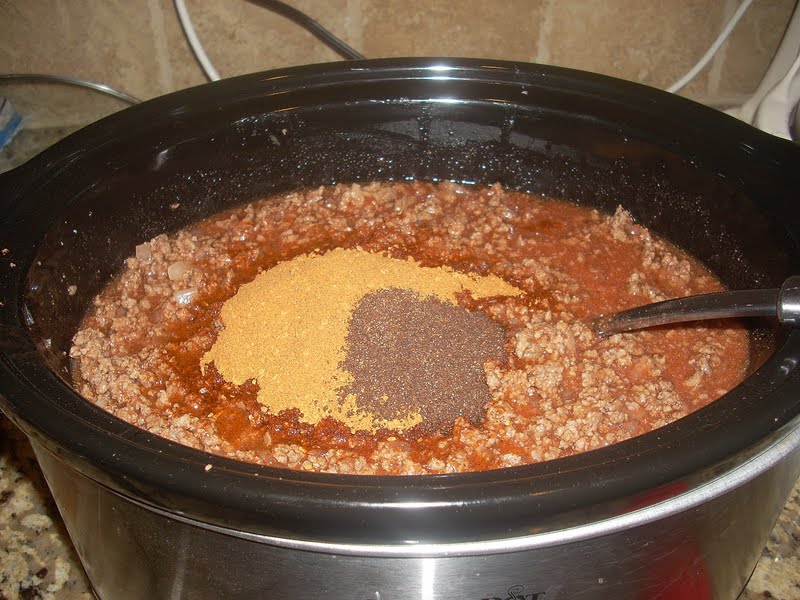
And finally, add your seasoning packets and two teaspoons of chili powder. Turn it on low and cook at least 8 hours.
A couple of times during cooking I use a potato masher to make sure any large chunks of ground beef get broken up. I also take a second or two to taste it and add more chili powder, or add a little salt if I think it needs it. You probably won't need to add salt at all if you use just the seasoning mixes (the general rule of thumb for them is one packet per pound of ground beef), but if you use only chili powder, or less of the mixes, you may need to add salt. The reason I don't add everything at the begining is beacase it takes awhile for the full flavor of the peppers to develop and any heat will increase during cooking.
All finished!

Mine is a little runnier than I usually make it, but I knew I would have to make this on Friday, and then heat it in a regular pot on Saturday. It would (and did) lose quite a bit of moisture during the reheating (and while waiting on my procrastinating relatives to show up).

Try it out. You can make it as spicy or as mild as you and your family like it.
post signature

Saturday, May 28, 2011

Crockpot Cooking: Pizza Casserole

As promised, here is the recipe for pizza casserole. This is another one we do in advance and take to church for lunch. We cook it on high for about an hour Sunday morning, then plug it in when we get to church, turn it on high, and go in during the greeting time (after singing) to turn down on low.

Pizza Casserole
Ground Beef                Pasta (your choice)
Pizza Sauce                 Milk
Motzerella Cheese       Pepperoni (or pizza toppings of your choice)
Onions                        Garlic
Italian Seasoning          Fennel Seed
Parmesan Cheese

Begin by browning your ground beef and cooking your pasta. We like rotini, but just about any pasta will work. I don't know how you like yours, but we boil ours with olive oil and kosher or garlic salt. Remember not to cook this all the way. It will turn to mush if you don't leave it kind of firm. I think ours cooked for about 7 minutes.
When the ground beef is just about finished, add in your onion.
The onion doesn't cook long, just 'til it starts to turn translucent, then add a couple of cloves of garlic, minced. Cook for a couple more minutes, then remove from the heat.
Go ahead and crush about 1/2 tsp of fennel seed.
I have a morter and pestel, but I used it for Grandma's medicine, and I just have issues about using it for herbs and spices again. So, I resorted to my pre-morter and pestel method - I put it in a ziploc bag, and bashed it with a rolling pin. Not on the towel, by the way; I just put that under the bag so you could see it, otherwise the fennel blended in with the countertop.
Everyone in the pool! We're going to mix this right in the pot.
As you can see, we were out of rotini, so we used macaroni this time.
Ground beef, with the onions and garlic, 1 teaspoon italian seasoning, and the crushed fennel seed.
Add your pizza toppings. I cut my pepperoni into fourths; it makes it easier for little people to eat, and then I separate it since it tends to clump together.
Next, add your pizza sauce. How much you add will depend on how much of the other ingredients you used. I ended up using most of two jars of sauce(15.5oz each) to approx. 4c. macaroni, 1 & 1/2 pounds ground beef, 1/2 of a large onion, and 2 &1/2 ounces of pepperoni. See?!? Measurments - most of which are fairly accurate. The pepperoni was precise - I weighed it for you on my kitchen scale. Pepperoni can overpower everything else if you use to much.
Then fill your jar about half-way with milk. Maybe 1c?
Shake it up to get the rest of the sauce out and pour it into the pot.
Give everything a good stir (it looks good already) and...
...stir in most of your cheese. I used a 4c. bag of pre-shredded motzerella.
Put the last of the motzerella on top, sprinkle with parmesan and cook on low.
I would not cook this all day, as the motzerella tends to burn easily, but this does work fine when put in at lunch, or in the morning if your going to eat it for lunch.
Excuse the less than professional plating technique. One of the girls took this for me while I was out for one of Beenie's guitar lessons this evening. Those extra, group lessons have been great, but I'll be glad when the evening lessons are over - I much prefer the morning ones.

This recipe can also be done in the oven. In fact, this was another oven recipe I converted to my crockpot so I would have additional options for Sunday fellowship lunches. The original recipe called for egg noodles, and they are fine when you do this in an oven, but turn to mush in the crock pot. Just prepare everything, except for the noodles*, the same way as listed above, and pop in the oven at 350 degrees for 20-30 minutes.
*Since they won't cook as long in the oven, you should completely cook your pasta before assembling the casserole. If using egg noodles, cook according to package directions.

Let the kids choose what toppings they want in the pizza casserole and they'll be happy to eat it. :)
post signature

Saturday, May 21, 2011

Sorry

I apologize. There won't be a crock pot recipe today. We worked in the yard all day and I'm exhausted, and sunburned. In fact, the only reason I'm on the computer was because they didn't have the Domino's that delivers to us listed in the phone book.

So this is it for today. I'll be back next week with a recipe for crock pot pizza casserole - a real hit with the kids.

For now, I'll return to my chair, put my feet up, wait for the delivery man and possibly rub some more aloe lotion on my face, arms, and neck.
post signature

Saturday, May 14, 2011

Crockpot Cooking: Venison

I know. Lots of people turn their noses up at eating deer. After all, most of us have seen Bambi. Who wants to eat anything that's that cute? And we were all sad when the hunters shot his mother. Right? Then there are those who've never eaten anything that didn't come from the meat section of their local grocery store.
Let me lay some misconceptions aside.
1)Yes. Bambi was cute, but they aren't still that little and cute by the time hunting season rolls around.
2)They lose all appearance of cute when they keep eating the stuff in your garden. And they seem to like the stuff in your garden better than anything else.
3)The deer have led a much happier, more sanitary, and humane life than anything you've bought out of your big chain, grocery store meat case.
4)No, they don't need to keep living that humane life forever. Do you know how many deer there are?? Trust me, the population could stand to be thinned down a bit before they eat everything and start starving to death. We are not currently in danger of over-hunting.
5)When prepared properly, they are delicious. Besides, they are much leaner than beef, and aren't we all trying to eat healthier?

There. Now that we've blazed through all your doubts and misconceptions, find yourself a hunter and trade him some baked goods and/or homemade preserves for some deer meat. Hunters that really enjoy hunting always have more deer than they can fit in their freezer.
There are tons of ways to completely ruin venison. Trust me, I've had my share of poorly cooked deer, but there are many excellent ways to prepare it as well (one of my favorites is for it to be roasted long and slow, and then turned into barbeque - mmmmmmmmmm!). If you want to make it seem more like beef, the following is a good method.

Venison in Mushroom Gravy

Deer meat - any cut but the tenderloin (good luck getting that from a hunter anyway); you don't want to waste the tenderloin with this method of cooking. Save it for grilling.
Beef stock (or water and beef base)
Buttermilk
Red Wine or Milk
Onions                        Mushrooms
Butter                         Olive oil
Flour                          Seasoned meat tenderizer
Pepper                       Worcestershire sauce

This does take a couple of days to prepare (don't worry, it's easy), so think about it in advance. If your deer is frozen, take it out to thaw the morning of the day before you want to cook it. It needs to be thawed by evening-time, the day before you want to cook. If I've confused you, sorry. Ex: If you want to eat it Friday evening, lay it out to thaw Thursday morning. There you go, that's less muddled.
The evening before you want to cook it, cut it into smallish chunks and put it in a glass dish. Cover it with buttermilk, put a lid or plastic wrap on top and put it in the fridge overnight.
The next morning pour it into a colander to drain.
There was more meat here than there seemed to be. Kay used our largest colander.
Rise it with cold water and leave it to drain while you prepare the onions and mushrooms.
Lightly saute the onions and mushrooms in olive oil and butter.
What? You don't see the mushrooms? Confession time. We didn't have fresh mushrooms - since they were canned we just threw them in the pot later.
Scoop out the onions and mushrooms with a slotted spoon, leaving the butter and oil in the pan, and set the pan off the element for the time being. Put them and the venison in the crock pot. I know, I know. The mushrooms aren't in this picture either. Trust me, they were in the final product.
Add flour to your butter and oil to make a rue. Yes I know. We didn't get all of the onions out of the pan. It's okay. Everything ends up in the same pot anyway.
Slowly brown your rue, then make your gravy using the stock, or water and beef base. Don't add quite as much liquid as you want because you will do one of the following at the end: Add 1 cup of wine, or 1 cup of milk. I like it with the red wine, but we didn't have any yesterday, so we used the milk instead. It's just as good that way. Also, add 5 or 6 healthy dashes of Worcestershire sauce, and season to taste with seasoned meat tenderizer and pepper.
Then pour your gravy over everything else in the pot and cook on low all day.
No - there is no 3 or 4 hour option for this. Not if you want just any old cut of venison to be tender.
This is great served over rice, just like beef tips, but I was in the mood for potatoes yesterday.
Mmmmmmm - it was good, and if you look close enough, you can see some mushrooms in there. :D
This was Kay's bowl. There are green beans under the potatoes and meat (shudder). I like green beans, but not all mixed in with my other stuff.

I know I used the word we in here, but in all honesty, I did none of the work this time. Kay and Bree cut the meat off the deer shoulder Thursday evening, and I told Kay how to prepare it for the crock pot as I was running around trying to get out the door for Beenie's guitar lessons yesterday morning. So, thanks girls. It was delicious. 
post signature

Saturday, May 7, 2011

Crockpot Cooking: Ham and Potato Casserole

This was one of those, "I'm tired of bringing the same old thing to the potluck, so what can I adapt to put in a crock pot?" kind of a thing. I usually do this in a regular, rectangular casserole dish, and I will admit that the top browns quite nicely in the regular oven, but this just gives you one more thing that can be done in a slow cooker, plus I hope it will inspire you to think outside the box and see what other recipes you may have that can be adapted to the crock pot.

Ham and Potato Casserole

Potatoes                      Ham (diced, or leftover)
Cheese                        Potato Water
Milk                            Sour Cream
Butter                          Flour
Parmesan cheese         Garlic salt
Salt                             Pepper

Peel and chop your potatoes and then par-boil them. How long you boil them will depend on how long they need to be cooked in the crock pot. If this will cook all day, you probably don't want to boil them but about 7 min, but whether you will eventually cook them all day or for about 45 min in the oven, you still want them to be fairly firm. Drain them, saving the potato water.
The next thing you want to do is make your own cream of potato soup. Melt butter in a large frying pan and add flour to make a rue, simmering slowly in order to cook the rue, but not brown it (exactly like it was done at the start of bechamel used in the macaroni and cheese recipe). Then add milk and potato water, equal parts is fine. For the crock pot version, you want this to be fairly thick because the moisture won't cook away in the crock pot like it would in the oven. Add garlic salt and/or regular salt and pepper to taste. The garlic salt really adds to it, but if you don't like a lot of garlic you may want to use part regular salt and part garlic.
Once your cream of potato soup is ready, add your par-boiled potatoes and ham. Left-over ham really tastes much better, but we didn't have any. Mix well but be gentle - you don't want to mush the potatoes.
Add in your sour cream - about 1 cup.
Then mix in your cheese. As you could see from the last photo, my pan was too full to add anything else, so I just finished mixing it in the crock pot.
You can use just about any type of cheese you like. This was a fiesta blend that the store had on sale. I've also used this recipe in order to finish up all the odd and ends of cheeses we had in the fridge.
For this size recipe I used a little over 1 pound of cheese.
Wipe the edges, to keep things from burning and then top with parmesan cheese.
Cook on low 6-8 hrs, or on high for 3-4.
Mine was a little thin this time. Someone was using the sink so I didn't drain the potatoes very well. It's okay, it still tasted good.
I love using luncheon plates. It makes a smaller amount of food look like so much more :).


This makes a fine crock pot meal, especially if you use your cooker a lot and need some variety, but I wholeheartedly suggest you also try this recipe in the oven. Prepare it the same way, pour into a rectangular casserole dish, top with the parmesan cheese, and bake at 350 until the casserole is bubbly and browned on top. It looses some of it's moisture so it sets up a bit firmer, which I like, and the crusty top is also really good. Either way, this is something that can be made in advance and held in the refrigerator until you're ready to cook it.
post signature